[Note from the Editor: This tutorial is designed to create a 35mm Depth of Field Lens adapter for use with Nikon lenses, which will allow your digital video camcorder to have the shallow depth of field found in motion film recording. (Daniel designed this tutorial for Nikon lenses because, as their design has remain largely unchanged for decades, they are the most widely available lenses on the market, and, as such, they are very reasonably priced. Thus, it seemed logical to design the adapter around this.) If you do not wish to make the Achromat-Diopter or the Wax-Ground Glass yourself, Daniel has kindly provided commercially purchasable versions in this tutorial.–JH]
If you want to adapt this tutorial for Canon EOS lenses, there is a slight modification. Bigger spacer rings are needed for the 62mm threads and the spacer ring is then glued to one of the extension tube rings. If you would like more information on this, please don’t hesitate to email me at: ilm1@gmx.de.
[Editor’s Note: At the end of the article, Daniel has made a number of graphic tutorials for adapting this for the HVX200, DVX100, and other cameras which you can download as a .zip file.-JH]
You will need these parts:
 Cheap Nikon extension tubes (with standard 58mm threaded rings) Cheap Nikon extension tubes (with standard 58mm threaded rings)
Take care there are 2 different models on the market with two different inner diameters: 54mm & 55mm. The one with 55mm inner diameter should have standard 58mm threaded rings.
Suggested sites:
http://www.enjoyyourcamera.com (or search in ebay) |
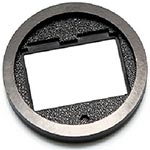
Vibrating gg-holder
VH-54 or VH-55 depends on used extension tubes. There are different models of the Nikon extension tubes that looks the same but the inner diameters are different.
Suggested site:
http://www.jetsetmodels.info/news.htm |
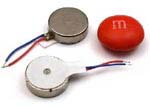
Vibrating Disk Motor
Suggested sites:
http://www.jetsetmodels.info/products.htm
http://www.hobbyengineering.com/H3425.html |

Simple ON / OFF Switch |
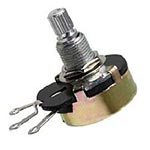
Rheostat or Potentiometer 25 Ohm (3-4 Watt)
This is important to control the voltage down to 0.8 – 1.0 Volt on the motor for proper vibration. |
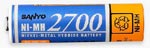 1.2 V Ni-MH Battery Mignon AA 1.2 V Ni-MH Battery Mignon AA
With a 2700 mAh battery you will get over 30 hours of non stop vibration. |
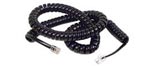
Simple Phone cable (for connections) |
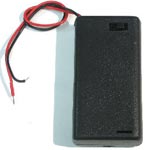
Battery Case for Switch, Rheostat and Battery |
 Focusing screen (GG = Ground Glass) Focusing screen (GG = Ground Glass)
You can use the Canon Ee-S or Ee-A that depends on your taste. (Look in online forums and you will find that there are several posts about that screens.)
Ee-A = The retail version is brighter than the Ee-S.
Ee-S = Has finer microlenses and is easier to focus than Ee-A.
(For information on setting these up, download the .ZIP file at the end of this article which includes graphic tutorials for this and other needs.)
Of course, you can also see how to make one of these yourself by going through my Wax-Ground Glass tutorial, which is reprinted here. |