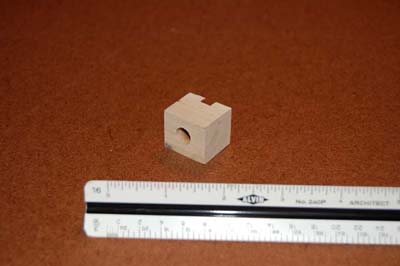
On another 6 X 1 1/4"dowel pieces, do the same--but only drill out one side of each. These are "one-sided" Bearing Carriers.
Leave 2 dowel pieces blank.
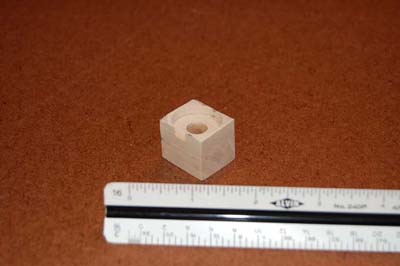
Using the drill press and 3/8" spire-point bit, drill out the center of each bearing space, all the way through the block.
Using drill or drill press and Countersink bit, countersink hole in bottom of each bearing space so that inner bearing ring clears well. You may use one of the bearings to make sure the inner ring turns freely when placed into the block--the fit will be a little loose...The inner ring should not rub the wood anywhere...
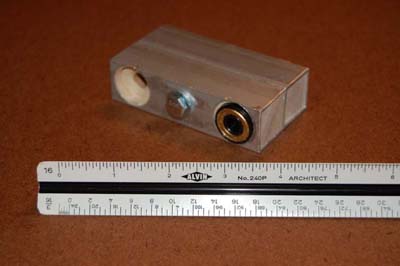
On the 4 X 18" Bones, insert a two-sided bearing carrier into each end, making sure bearings pop through the holes in the aluminum and seat into the wood Bearing carriers--The bearings should be nearly flush with the surface of the aluminum, but should protrude slightly. Secure the Carriers by drilling and screwing 2 small wood screws into the bottom on each end....
On the Joints, insert a one-sided Bearing carrier into each end and seat a bearing into it. Repeat securing with the small screws.
On the Vest Mounts, insert the two remaining one-sided Bearing Carriers in to the ends that match. Place blank, undrilled ‘bearing carrier’ wood pieces into other ends to aid in support. On the ‘Blank end’, drill a 1/4" hole through the middle of each side—all the way through, cross ways.
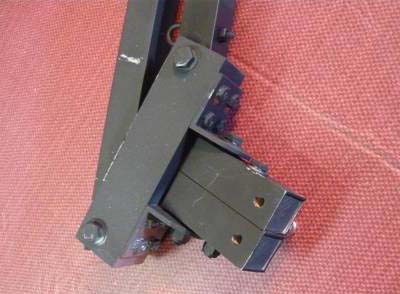
On the Joints and vest mount pieces, drill a hole dead-center through the middle top and bottom of each using the drill press and 3/8" metal bit. Clean edges. If any particles remain inside the tube and rattle, they may be blown out with air.
Bolt Joints or Vest mounts together using 1 X 3" X 5/16" bolt, washer at each end, and Nylon Lock nut. The ends and sides should line up exactly--so that the holes through the bearings, Carriers, and Joints all line up... Drill the 4 corner holes into the 2 2”x1 ½” plates—1/2” from each end, and 3/8” from the top and bottom edges… Drill corresponding holes through the sides of the assembled Joint. Affix the two as side plates, using the (4) 1 1/2” #10 screws/washers/nuts.