3D compositing can be extremely challenging but at the same time, very
rewarding. Unfortunely, one of the difficult parts of compositing is to create a
format that is usable in a variety of editing environments. Lightwave's alpha
channel is an exellent way to do this even if making a "perfect alpha" is quite
tricky. The problem with alpha channels is that when an image is rendered using
motion blur, DOF or even anti-alias, whatever background information was used
during the render, the edges will contain color portions of that because of the
way that render passes are mixed together. Another difficulty is casting shadows
onto a background image without damaging the background. Here, we will explore
the basics of compositing and specifically look at how to create shadows and
matte objects that don't interfere with the composited image.
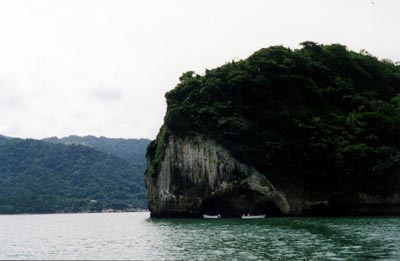
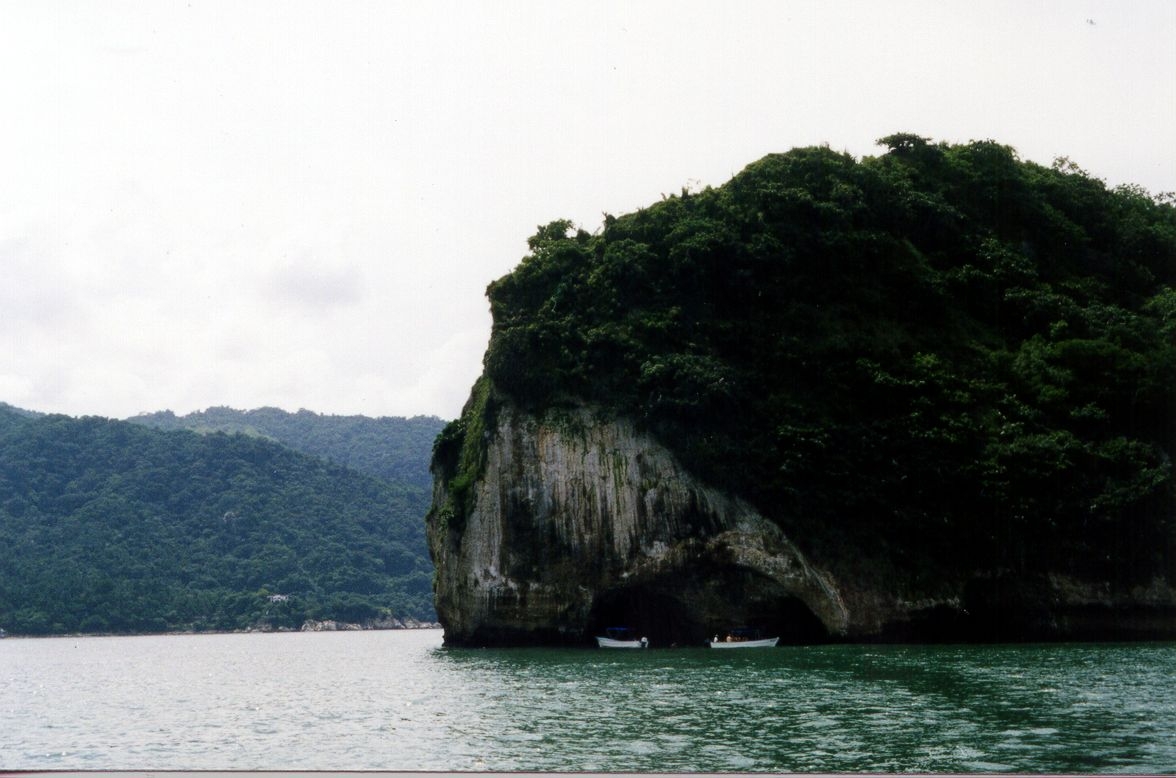
The first thing we need for our 3D composite is a background image.
Obviously, you would want video as the background (hopefully the camera was
still for ease) but for this tutorial, an image makes things manageable. If you
don't have one of your own, download this picture I took of a great snorkelling
island at Puerto Vallarta. The first thing we need to do is deside what
objects you need to composite from the picture. Here, you need to trace the
island so that you can create it as an object and also create a simple plane for
the ocean water. Make your plane first and save it. Then there are two ways to
create the island, you could trace the island in Modeler from a background image
or you could magic wand the sky away in your favorite paint program and then use
that new image to clip away another plane in layout.
Its tedious trying to
visually line up perspective and positions of these stand-in models but if
they are kept simple and you attempt to position them similar with respect
to the position of the real camera from the background, you can get it to
be quite accurate. Ideally, you would have been on set and recorded all
the measurements for positioning your stand-ins later with much better
accuracy, but this isn't always possible.


