I’ve been lighting sets of all shapes and sizes for nearly ten years now, so it probably won’t surprise you to know that I believe the way a filmmaker lights his or her productions is extremely important. In fact, lighting often tells as much of your story as the dialogue does. And it dramatically effects what your audience “hears” when they view your product. The manner in which you light the set and actors shapes the way the audience receives your message. It sets the mood of the scene, reinforces the tone of the environment and, at its most basic level, either illuminates or obscures the most critical nuances of your production. Pretty important stuff, right?
I know that many of you are more than a little intimidated by the prospect of lighting your film on a budget that is already stretched WAY too thin. First, let me reassure you that you don’t need the entire ARRI, Mole Richardson, etc. product line to effectively reinforce your story with lighting. What you really need is a little know-how and the confidence to explore unfamiliar terrain. So kick back, relax and let me be your tour guide as we explore the art of guerilla lighting. In the next few issues of Microfilmmaker Magazine, I’ll be sharing with you some of the fundamentals of lighting, beginning with the basics and moving to more advanced concepts. This article is going to deal mainly with techniques you can employ with little more than a trip to your local hardware store.
Only a month or so ago, I was working on an intense three day shoot with the shoestring budget to end all shoestring budgets! I was on board as the Gaffer (head lighting technician) on a volunteer basis helping a local filmmaker turn his dream into a reality. Fortunately, the director had a couple of tools to use, but by and large, I had to start with absolutely nothing and assemble an adequate lighting arsenal for about $200. Impossible? Not at all! Here’s how I did it.
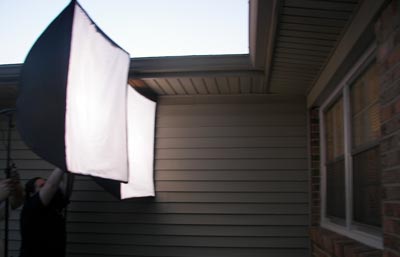
Keep track of the sun's position, intensity and color temperature when shooting outdoors. Often blocking or bouncing the light with PhotoFlex will allow you to harness the solar power efficiently.
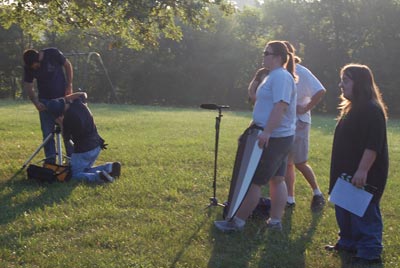
The first thing to determine, on any shoot, is all the locations that you will be shooting at. Take a notebook with you and write down the locations, time of day the scene will be shot and any other observations you make about the setting. This is especially important when you are shooting outdoors, since controlling the environment with ultra-limited resources is next to impossible. That doesn’t mean you can’t use your ingenuity to work around many issues though. The Director of Photography (DP) will be relying on you to help him or her think ahead to identify difficulties you may encounter, so speak up if you notice obvious impediments that will affect how and where the scene is ultimately shot. For instance, the sun’s location and intensity of the rays will change over the course of the day. So if you set up your equipment and stay in the same spot all day, you’ll find there is a huge difference in the lighting you’ll encounter when shooting at 12 noon versus 4 p.m. You must compensate for elements like this one that you have no control over. It is much less frustrating and time consuming to consider these in the pre-production stage than in the middle of a shoot day.
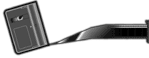
During our time shooting outdoors, I used several different methods to use the natural light to our advantage. Our biggest ally was a shelter without walls we found at a local park. The roof kept the sun from flooding the shot and making the image too hot (bright), but allowed plenty of light to expose the subject indirectly. We also used a piece of equipment called a PhotoFlex reflector to bounce light up onto the subject from underneath. This was very helpful in combating those dark shadows that bright lights create on uneven surfaces such as faces. It is the equivalent of a small fill light without any cords or power source required. A PhotoFlex also weighs only about a pound and is “flex”-ible. So a gaffer can bend and twist it in a variety of ways to position the light at odd or difficult angles. Most of these reflectors have both a shiny and matte side, so you can adjust the light you create based on your needs. One final advantage to having this tool is that you can also flag (block) light when you need to. This is helpful for either harnessing light’s intensity to illuminate your subject or block light from hitting your subject altogether. Not only is it versatile in terms of use, but it is collapsible to 1/3 its full size for easy storage. You can purchase a 42” PhotoFlex reflector online for around $50!! Trust me when I say you owe it to yourself to invest in one or two of these. This is a piece of equipment that will be helpful to you in any and every lighting situation, so invest in one!