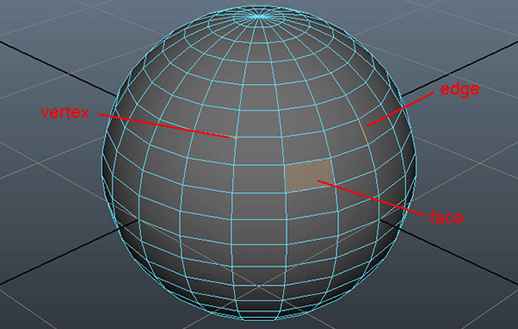
Polygon meshes can be modified by adjusting the vertex, edge, and face.
The interface for Autodesk Maya 2011 can be pretty intense for people that have never tried any other 3D program before. If you have worked in a 2D graphic program like Adobe Photoshop or Illustrator, you'll notice a lot more icons, palettes, drop menus, input fields, etc. then you might be used to. When opening Maya for the first time, you'll see all the main interface elements visible at once so that you know they exist. Here's a list of the various parts.
Menubar – contains general and specialized tools for all operations within Maya
Status Line – panel of buttons for general operations, selection of mesh components, transforms, rendering, etc.
Shelf – tabbed panel for holding tools that are most used for each specialized division
Tool Box – panel containing manipulators to move, rotate, scale, etc. the mesh or its components.
Quick Layout Buttons – buttons to change the layout of the viewport area
Time Slider – used to set keyframes and scrub through the timeline of animation
Range Slider – adjust the amount of time is shown on the Time Slider
Command Line – input field for either MEL or Python Scripting
Help Line – feedback field to reflect what operations have just been executed as well as error messaging
Viewport – panel for working with the mesh/object in a 3D environment
Viewport Menu – panel for changing how the viewport renders the 3D environment
Viewport Toolbar – panel of buttons for quick access to render options of the viewport
Channel Box – palette to change translation features of the mesh/object that is selected
Layer Editor – palette to organize your assets on different layers as well as change the rendering options of the objects on that layer
The good thing is that you don't have to necessarily memorize where everything is and what everything does before you jump right in. For example, if you focus on just modeling when you start out, you won't need to use the menus or workflows that have to do with rigging or animation. And if it makes it easier, Maya allows you to customize what panels are showing and where they are placed, taking advantage of the new Qt interface technology, new to Maya 2011. Panels and boxes can be moved or collapsed for convenience and palettes such as the Channel Box and Tool Settings can be fold back into tabs on the side of the window. Add to that the ability to hit the spacebar to access all the menus in a floating GUI, the Hotbox, as well as make your own custom marking menus, and you have an assortment of options for creating the layout that works best for you.
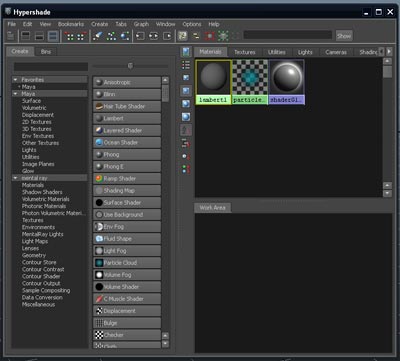
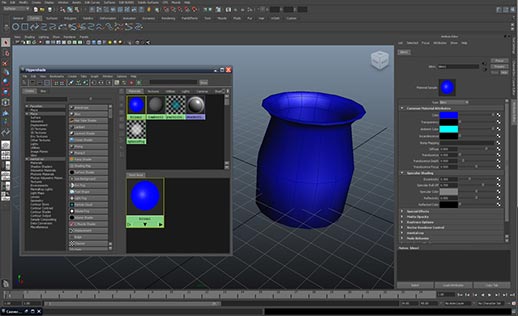
The hypershade contains the shaders that control the look of your model.
One of the first things most artists begin with when starting on a brand new project is to build a 3D mesh. Currently, the most common ways to constructing a 3D object or character is by using polygons, nurbs, or subdivs. Polygons are the simplest to work with and can be modified by manipulating the vertex points, edges, and faces to shape the object. An object can be transformed and expanded upon using manipulators, selecting a tool from the Polygon shelf, or picking a tool from the Mesh and Edit Mesh menus in the menubar or hotbox. Building off of basic primitive shapes, or from scratch, these tools and operations can be used to cut, wedge, extrude, etc. a polygon mesh in order to create your finished product. This is a great place to start to experiment and see what the tools can do for you while you build in 3D.