Publisher: Digital Film Tools
Website: Click Here
Platform: Windows, Mac OS
x32/x64: x64
Description: Video Effects Filter Plugin
Purchase/Rent: Purchase
Pricing: $95.00 (for Film/Video version)
Download Demo: Click Here
Release: Available Now
Review Issue: #142 (12/17)
Reviewed By: Manuel Crosby
Final Score: 6.5 (out of 10)
Ever-advancing digital camera technology has helped many micro-budget filmmakers kick down doors and create quality movies. However, some of these creators miss the look of celluloid… the colors, the skin tones, the beautiful highlights, and the grain… Is it possible to truly capture these aesthetics on a budget that won’t allow for the purchase and processing of film stock? Enter Digital Film Tools, and their latest plugin for editors and colorists: Film Stocks v3. In this review, we’ll take a look at the film/video version of this software and see how close it gets us to the celluloid visuals of old.
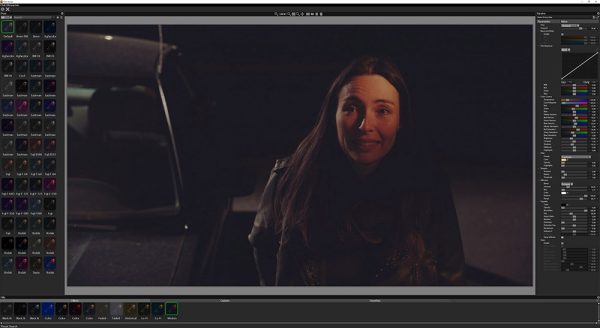
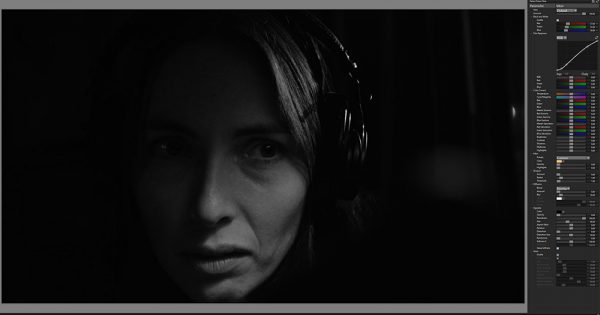
Film Stocks v3 seeks to bring users the tools to emulate the look of film in their digital video color correction. (featuring actress Nicole Berry)
Ease of Use
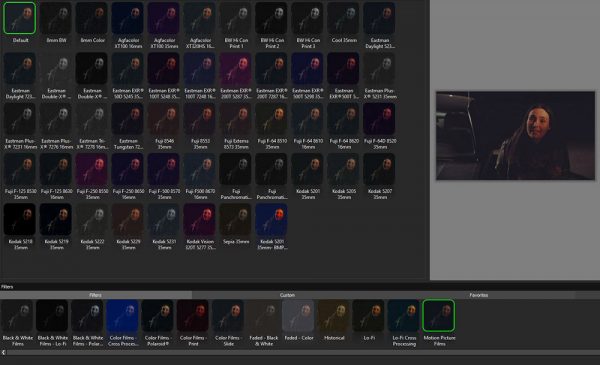
Overall, I found the DFT Film Stocks plugin relatively easy to use. When you apply it within a program, such as Adobe Premiere, Sony Vegas, or DaVinci Resolve, you can either manipulate the controls within the editing suite as you would any other video effect, or open the special DFT Interface window to work from there. I found this second option to work best, due to the ability to see the thumbnail samples of the different film stock looks in the program. These looks, or LUTs, are laid out categorically, which makes them very easy to navigate. Finally, the controls in the DFT Interface consist of sliders, wheels, and curve graphs that you are used to seeing in most color correction suites.
Despite the positives, one frustrating thing is that you cannot play the clip within the DFT Interface to see what you have done in motion. The interface will only show you the preview of the frame that you have stopped your timeline cursor on within your source editor. This can be problematic if your video clip contains a range of subjects and colors that move in and out of the frame- you will not be able to tell how the applied DFT LUT impacts all frames of the shot until you go back into your source editor. And, when adding grain to the footage, you will not know how the grain elements move and interact with the footage fully until you go back into the source program and render your shot. It isn’t a deal-breaker, but it can cut down on the speed of your color correction and grading.
Depth of Options
This program contains a great depth of features. The wide variety of preset looks opens up a whole new world of color correction ideas for beginning colorists. I really appreciated the wide range of LUTs, which include motion picture film, slide film, polaroid, print, and black and white options, among others.
Furthermore, once you choose a baseline, you can edit the parameters using the full color correction controls within the program. This is great for taking the idea of the LUT and customizing it to your needs and your particular footage. Also, it helps because the looks react differently to footage that is shot flat than they do with footage that already contains high contrast and saturation. The flexibility allows the editor to make each LUT work for them. If the LUT doesn’t seem to apply a pleasing effect to your footage out of the box, play with the parameters to see if you can make it work. Once done, you can save your custom result for easy location later.
This does bring me to a downside of the software. If DFT had provided camera profiles for each LUT, then users would have an easier time making the LUTs work for their particular footage. Because every camera handles color differently, it would really speed up the grading process if users knew exactly what the LUT was designed to look like for their equipment.
Finally, DFT Film Stocks includes other FX plugins aside from the Film Stocks effect- such as Bleach Bypass, Two-Strip and Three-Strip Color, Color Correction, and Grunge. In particular, Grunge allows the user to add dirt, hair, and scratch effects to their footage. These additions provide even more possibilities for users in emulating the looks they are after.
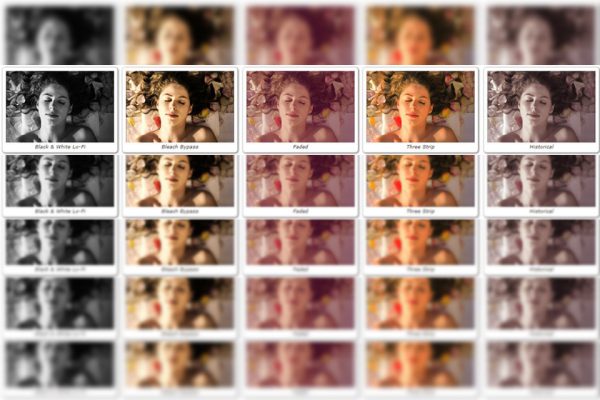
Film Stocks includes look categories like Black and White, Bleach Bypass, Three-Strip, Faded, and Historical
Performance
For color correction and LUT application, I found the performance of the software somewhat effective. As rendering is handled within your editing suite, render speeds will hinge on that software in conjunction with your computer system. Within DFT, you can choose whether you want your GPU or CPU to handle the rendering as well.
Unfortunately, if you are editing on a 4K monitor, then unfortunately the text within the program does not show up properly for the preset look names. The letters are expanded, and then the words do not fit inside of each text box. You have to hover your mouse over each preset to read the title. This was a cosmetic annoyance to me, because I prefer to do color grading and finishing on a 4K screen- however, I admit that it does not impact the quality of the results.
However, a performance issue does occur when adjusting the sliders to dial in a chosen look. While the user is dragging a slider, the selected still frame changes to correspond to the correction. However, when the user releases the slider, the image seems to lighten slightly- throwing off the adjustment somewhat. This quirk will likely frustrate users who want to make very fine adjustments and see what they are doing in 100% real time.
As far as film grain emulation, I feel that the program cannot create a realistic, acceptable result. The grain texture appears blocky in shape, more like digital noise than organic film grain. Furthermore, the movement of the particles does not appear random. I had much more success when using a third party grain overlay in my editing program. However, a note to users- each Film Stock emulation setting includes some level of DFT-created film grain emulation. I would recommend turning the grain option off each time you apply the looks, and adding your own separately, if you are in search of more realistic grain.
On the other hand, I felt that the blur options performed very well in emulating the look of softer lenses and the creamier qualities of highlights in film. A combination of blending modes and adjustment options for creating blur were extremely easy to understand and manipulate. This really added to the effectiveness for me, as I have not encountered tools to achieve the same result this easily in other softwares.
As a final disadvantage, when using this plugin within Premiere, it seems that the DFT Interface does not reflect any stacked effects you have applied to the clip. This means, if you have applied Premiere-based color correction or video effects, or if you have already applied one occurrence of “Film Stocks” and wish to apply a second on top, you cannot see the older effects in the DFT preview window. So, if you want to add saturation or contrast to log footage before adding a DFT LUT, you will not be able to see the earlier effects in the DFT interface. This does not happen in DaVinci Resolve if you are using nodes, or in Sony Vegas if you are stacking effects, so I assume it is a bug that has been worked out in the OFX program versions, but not Premiere (as I run a PC, I could not test the Final Cut version of the plugin). This will prove problematic for users who normally do their color work in Premiere, and like to build on grades in layers- as it introduces yet another step (apply DFT effect, exit the interface, preview your work in Premiere).
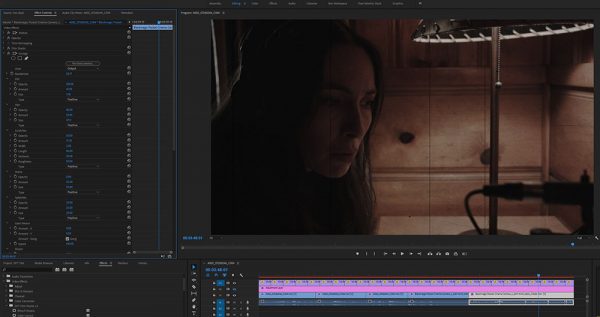
DFT controls within another editing suite, along with the addition of a “Grunge” look which applies scratches, dust, and hair effects.
Value
At $95 for use across programs on a single computer, the plugin may prove a little on the expensive side for some users. It lands somewhere in the middle of the price points for competing products. Overall, DFT’s software offers a lot for users looking to emulate film stocks in terms of color. But the program’s other issues may prove too difficult for some. One would need to demo this product along with other competitors to see if Film Stocks’ weaknesses- the main one being its grain production- would deter the user from purchasing this particular program in favor of another. Thankfully, DFT offers a 15 day trial. I would highly recommend that users test it to see if it works for them.
Final Comments
Film Stocks v3 offers some great options for users looking to achieve visuals closer to traditional celluloid by grading digital footage. A few features really stand out and prove easy to use- providing a lot of value. However, quirks within the program slow down the grading process, and the lack of a realistic film grain emulator detracts from the overall effectiveness. Ultimately, users should give it a try to see if the benefits will work for them in their quest to capture the look of film!
|
Breakdown
|
|
|
Ease of Use
|
7.0 |
|
Depth of Options
|
7.0 |
|
Performance
|
6.0 |
|
Value vs. Cost
|
6.0 |
|
Overall Score |
6.5 |

1 Comment
Good breakdown. How do you think this stacks up to something like FilmConvert?