[Editor’s Note: This is the third article in our still photography series. If you’ve missed the earlier articles, check our first overview article and our second article on choosing a camera. -JH]
When it comes to choosing lighting for your photography, it can become a bit overwhelming, since there are so many choices.
With that said, we’ve had a chance to really look at some interesting products and help you hone in on some really powerful solutions and the overall pricepoint you’d be looking at. In part 1 of this article, we’re going to look at traditional still light sources, from sunlight/ambient to studio flash to mobile strobe. In our next article, we’ll break down light sources that are great for photo or video work and get into some light modifiers to give you the most control over your final image.
Note: We tend to mention a lot of the FlashPoint products from Adorama in this article. That’s because Adorama proved the most reliable about participating in our testing and because we honestly felt many of their products were superior to the competitors we’ve personally worked with.
Sunlight/Natural Light
Sunlight is free and readily available, right? Yes—sort of.
Why not just use that? Great question!
While photography allows you to catch perfect natural lighting more easily than motion filmmaking (because a single image is a lot easier to grab than 24 images a second), sunlight is still a two-edged sword even in this world.
This is most notably because unmodified sunlight is actually not very flattering for 95% of the day. (The 5% that is—known as “magic hour”—occurs only in the immediate post dawn morning and in the immediate pre-sunset evening. If you have no scheduling conflicts and you’re shooting images that could go with a romantic film or a country album, then this is perfect. However, for most people and projects, waiting around for magic hour isn’t going to be a good solution.)
As such, Sunlight is all about finding the perfect setting, and then moving your models or actors into the shade. (Or going the Hollywood route and building shading tents to keep the direct sunlight off the actors.) In most situations, you’ll still want a reflector for this type of photography, so that you can bounce highlights or a keylight on one area of the model. (We’ll discuss reflectors more in our following article that includes light modifiers.)
The Natural Light alternative to Unmodified Sunlight is diffused sunlight through clouds or rain. Diffuse light is usually the most flattering light, but it’s even harder to schedule than magic hour. Still, there are some amazingly captivating images that have been snagged during (or right after) a surprise rainstorm or fog burst.
As such, try to be prepared so you can take advantage of happy accidents when they occur, but don’t bank your shoot on them!
Long Exposure
If you have a model that’s really good at sitting still, you can use long exposure to overcome a lot of lighting difficulties with still imagery. (While Long Exposure can be combined with almost all other lighting types, it seemed the most logical to lump it in with natural light, since that’s when many people would try to make this work.)

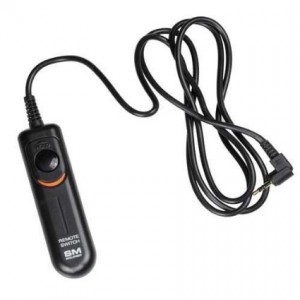
Ledge Switch or Bulb Trigger allows manual released exposures. (Canon compatible version illustrated.)
Long exposure is pretty much exactly what it sounds like: you set the shutter speed from 1/200th (or whatever you’re shooting at) down to ½ second or even as much as 30 seconds for some forms of really low-light shooting. (If you get an inexpensive “ledge-switch” or “bulb” trigger, you can set the exposure on your camera to “bulb” and lock open the shutter to expose it even longer. This is largely done to record images of stars and other night entities.)
With this technique, dim light in a house can easily expose a subject—and, on the longer exposures, a full moon can provide you with what you need.
The downside is that any form of spontaneity you want to capture in your image is pretty much shattered when the model has to stay put for any period of time. Additionally, digital cameras have a tendency to add artifacts that aren’t present in film cameras during long exposures. Most cameras have settings to minimize these artifacts, but you’ll usually have to do a bit of extra touch up after the fact.
Studio Strobe Lighting
If you are going to be getting into more studio setups—or greenscreen photography—then setting up a studio is a great idea. There are numerous companies that make studio lighting, from Bowens to Photogenic to Paul C. Buff (who makes the increasingly popular Alien Bees).
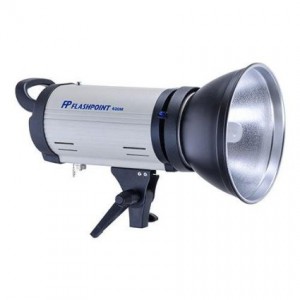
We’ve been using the Flashpoint 620M 300 watt monolights, which retail for less than $200, and have found that using two of them together (without needing a higher power keylight) work well in most situations.
Some photographers recommend that you get 500 watt monolights, so you have the most options. However, we discovered that most lighting setups can be accomplished with 300 watt monolights. If you need something more powerful than that, it’s usually because you’re being heavily backlit by sunlight—perhaps through an open window or on a porch. On a low budget, don’t try to fight a war with the sun. Instead, try moving your model into some shade and using the flash to sculpt them in a more gentle environment. (It’s a lot less painful on your actors or models, as well as being easier on you and your equipment.)
If you want to get some of the bang of the speedlight/mobile strobe lighting options we’ll talk about later for a lower price point, you can add a mobile battery pack for less than $150—or get it as part of a battery strobe package like this one for less than $300. (Just be aware that, if you do go this route, you’ll probably want a wireless trigger, as these more basic monolights don’t have wireless technology built in. While they do have a slave option, we’ve found the slave triggers are a little spotty—tending to go off at unexpected times due to other flickers of light you can’t control. The battery powered wireless trigger runs about $30 and are extremely reliable.)
Flashgun & Mobile Strobe Lighting
For most filmmakers, having the ability to shoot wherever you want is very appealing. As such, this is probably the type of lighting you most want to look at. With that said, just because something, like a flash, may mount to your camera, that doesn’t mean you actually want to mount it to your camera!
In the motion film world, most filmmakers have learned that it’s hugely superior to record audio from a mic on a boom pole that’s close to the actors than to mount it on their camera. Even though you can get a shoe mount that will allow you to mount it on your camera, folks who go that route end up damaging much of your audio because it’s too far from the subject they’re recording—on top of the fact that they normally also pick up recording noise from the camera. Mounting a flash on your camera and shooting straight on is likewise almost always a bad idea. (Just look at a documentary that’s been shot solely with a camera mounted video light to further understand how nasty this usually is!)
Instead, the best use of flashguns and mobile strobe lighting is through “Off-Camera” layout—where the gun or strobe is mounted on a light stand and triggered wirelessly. (Most flashes do have the ability to rotate so you can bounce the light off a reflective wall or an actual reflector while mounted to your camera, but this provides quite a few limits on what you can capture and where.)
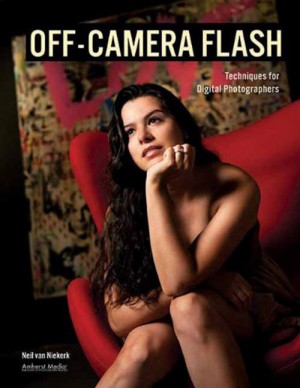
In Neil van Niekerk’s book, Off-Camera Flash—which is a really great resource that helped me improve my off-camera flash game–he recommends “purchasing the most powerful flashgun you can afford.” The logic for this is that you want the most options for getting great shots in the field, and, if you have to use a diffuser of some sort, then you’ll need even more power to get enough light on your subject.
While most of us aren’t going to be able to swing starting with a Profoto B1 500 AirTTL at $2k-$3k, $500 is a pretty reasonable place to expect to start for a flashgun that meets these needs. Canon’s 600EX-RT Speedlight starts around the $500 and the Nikon SB-900 starts at $570.
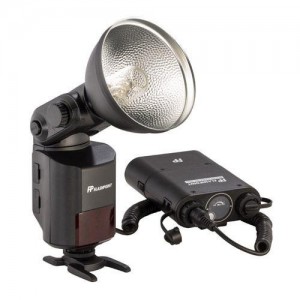
I personally have been working with the Flashpoint 360 WS Streaklight and Blast Power Pack, which is really powerful and has a really polished look for how it casts light. (Although its retail pricing is higher than either the Canon or the Nikon normally, their current discounted pricing is comparable to them both.)

The Streaklight includes a “barebulb” strobe that’s got impressive light output. The Blast Power Pack battery lasted for hours in grueling, fast-recharge conditions when I used it.
Unlike the Canon or Nikon, the Streaklight uses a glass bulb that is more like studio strobe, which yields cleaner light with a nicer falloff on the edges. It’s more powerful than many of the popular studio strobes and I was shocked at how much I could illuminate at the recent Zombie Walk in Cincinnati, which I photographed in the iconic Fountain square. The recycle speed with the Blast Power Pack is also really impressive. (The pack has a clip to hang on your belt or to an optional mount on your light stand. It also allows you to swap the actual batteries very easily, which helped a lot in the aforementioned Zombie Walk I photographed.)
With that said, there is a tradeoff when you go from an encased strobe like the Canon or Nikon to a barebulb strobe like the Streaklight. The exposed bulb is surrounded by a plexiglass tube, which makes it more rugged than if it was a glass tube, but it still means you can break it more easily. At $90 per bulb that’s a definite consideration.
Hopefully, this article has provided a good introduction to lighting for still photography and may even have given you some ideas for things to put on your Christmas list this year. In our next article, we’ll look at LED lighting along with light diffusers and modifiers! (You may be surprised at what you can accomplish with some of these when used in harmony!)


